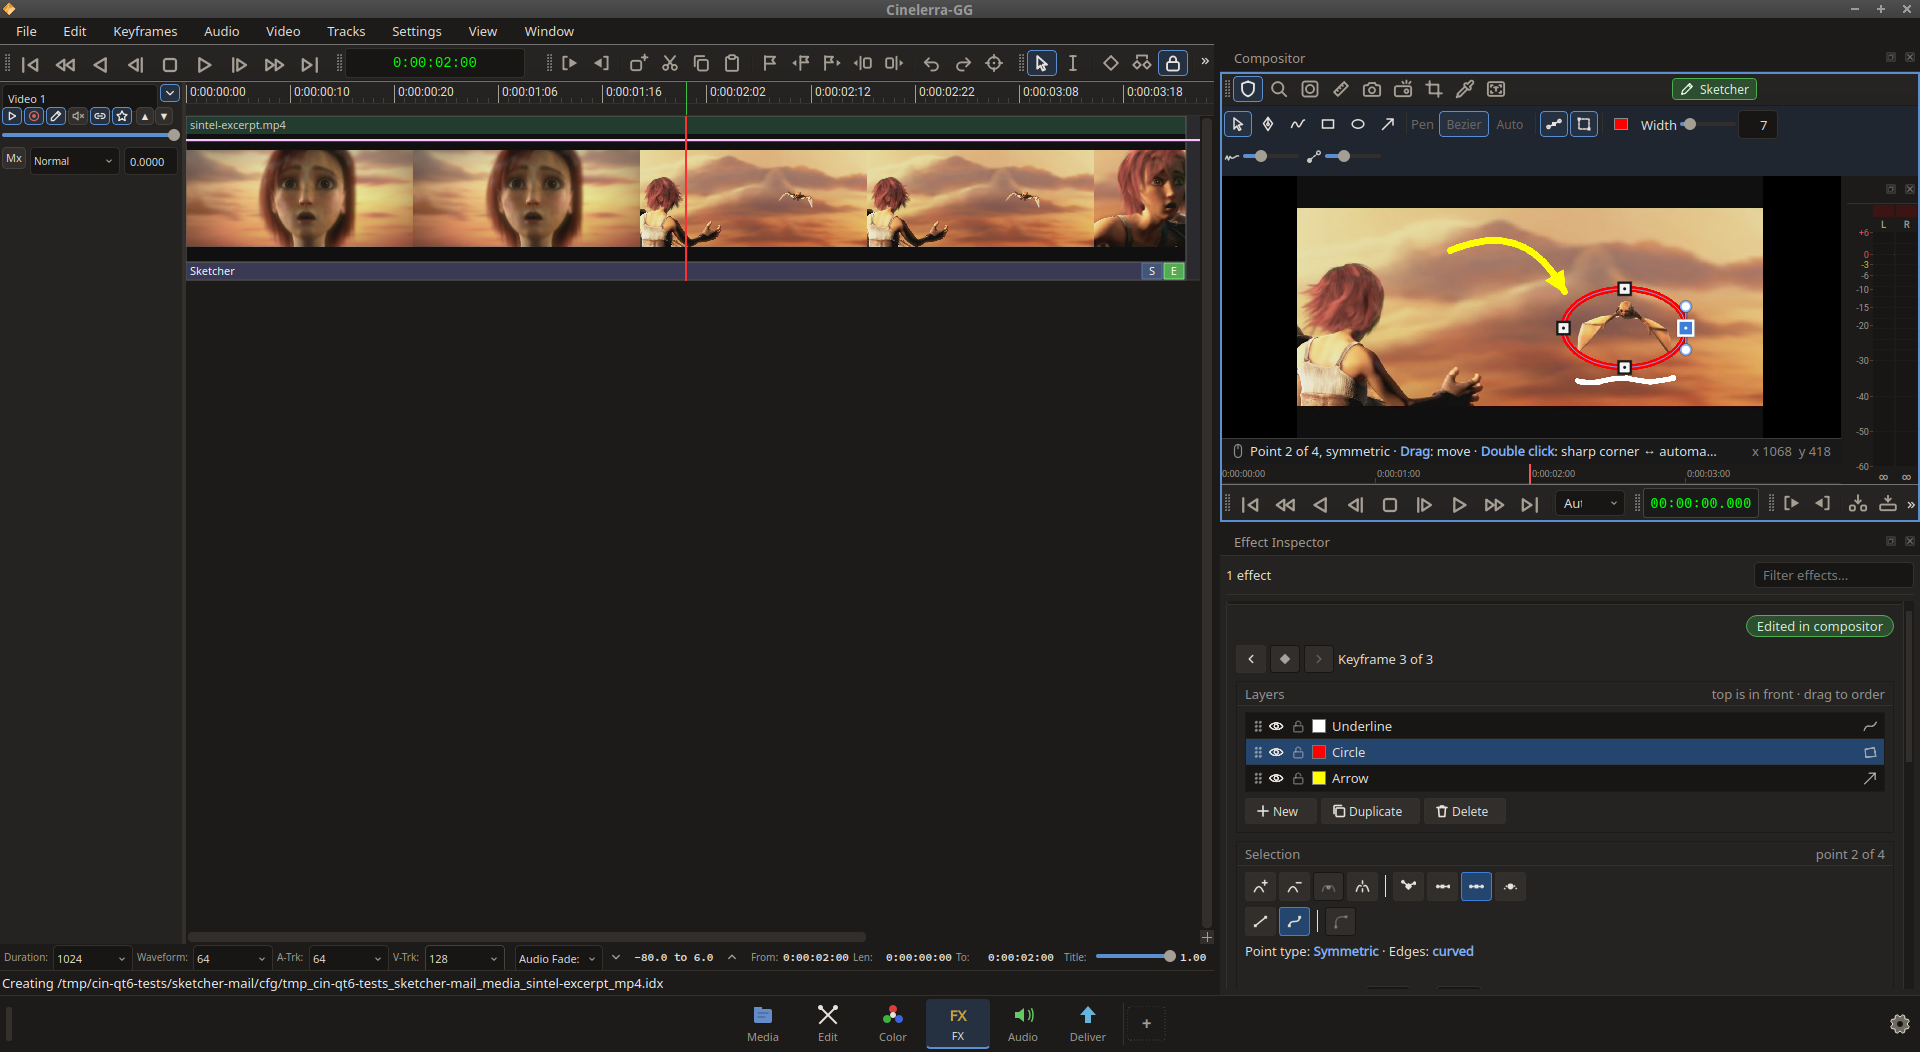
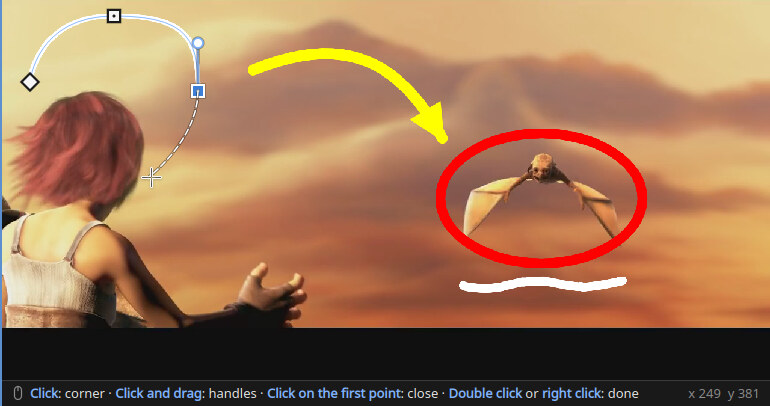
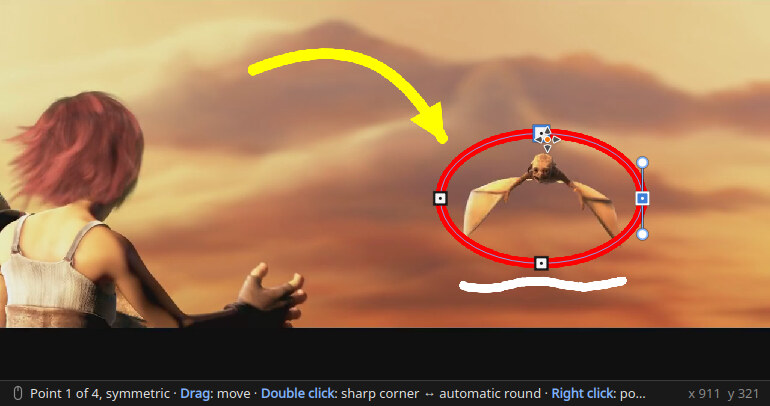
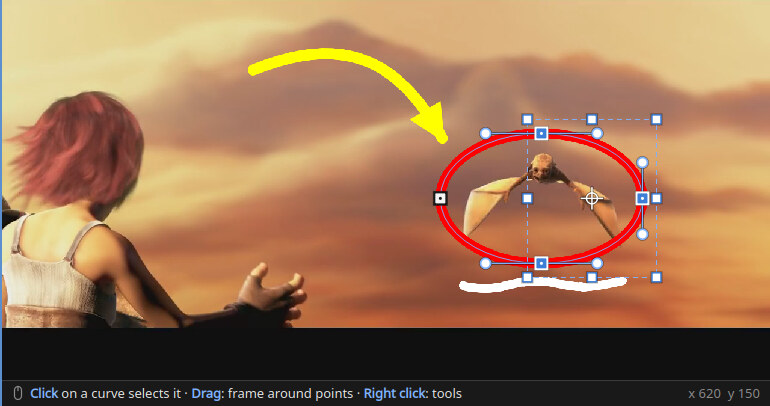
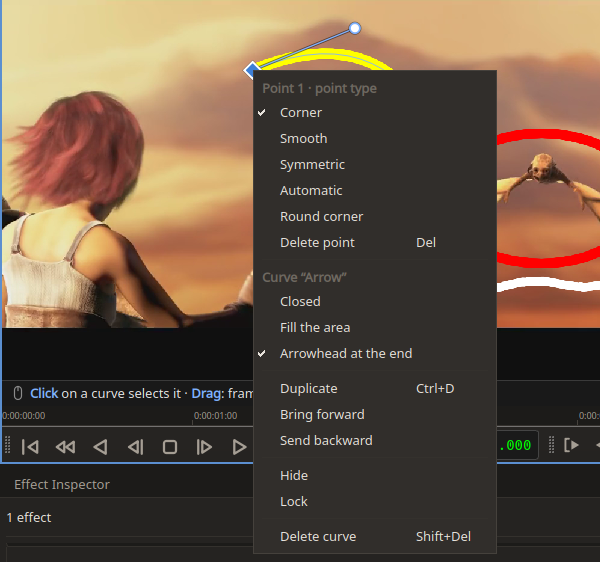
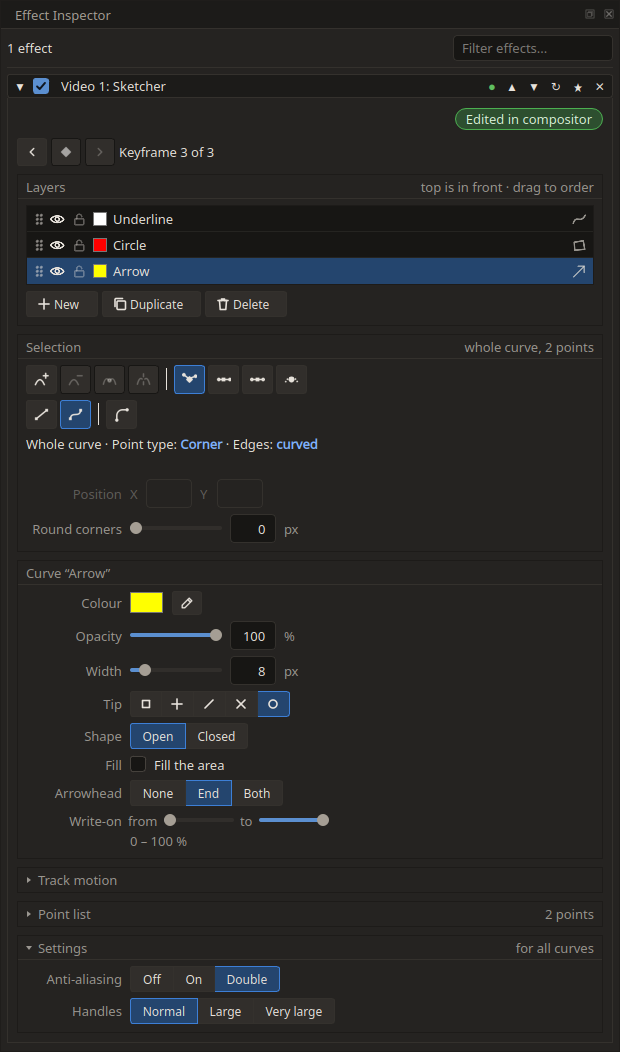
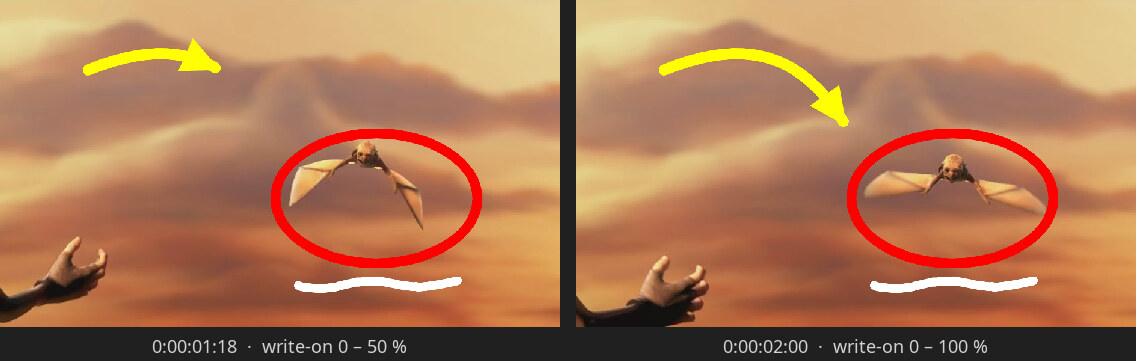
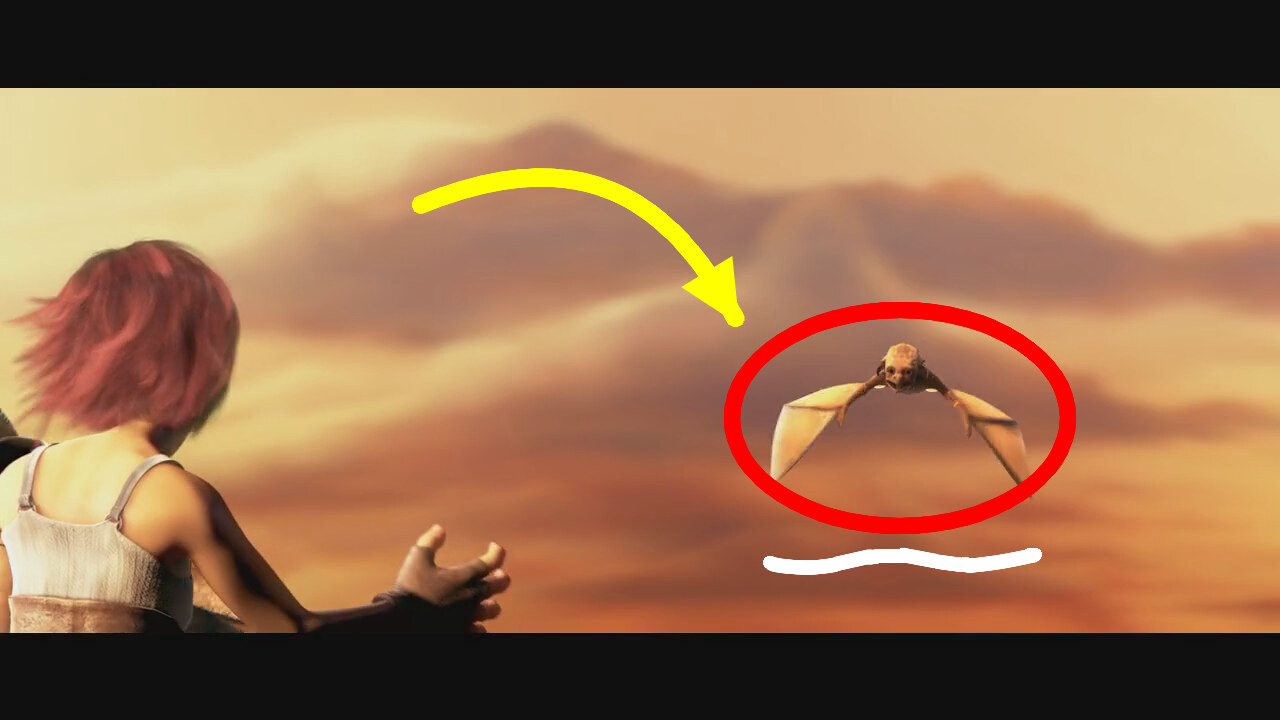
Hi everyone, Sketcher, the drawing effect of Cinelerra-GG, works quite differently in the Qt6 alpha now. You draw and edit right in the Compositor, the way you would in a drawing program, and all settings sit in one panel of the Effect Inspector. Here is a short tour with pictures. The AppImages of 2026-10-19 have it: |https://download.cinelerra-gg.org/?path=qt6-alpha&sort=date_desc| The film in the pictures is the Sintel trailer, © copyright Blender Foundation | durian.blender.org, licensed CC BY 3.0. 1. Getting started Put Sketcher on a video track like any other effect and open it in the Effect Inspector. The Compositor then shows a green *Sketcher* button and the Sketcher tool bar. A click on the green button pauses Sketcher, so the other Compositor tools get the mouse again. The switch *Edited in compositor* at the top of the panel does the same. The main window: Sketcher on the timeline, three curves in the Compositor, the Sketcher panel in the Effect Inspector For this picture I used the FX workspace and made the right column a little wider. Everything is docked. 2. The tool bar The green Sketcher button and the Sketcher tool bar of the Compositor From left to right: *Select (V)*, *Pen (P)*, *Freehand (B)*, *Rectangle (R)*, *Ellipse (E)* and *Arrow (A)*. The letters work while the pointer is over the Compositor. Then come the two modes of the pen, the buttons that show the handles and the box, and colour and width. Colour and width change the selected curve. With nothing selected they are the defaults for the next new curve. The second row holds smoothing and stabilizer for Freehand. 3. Drawing * *Pen:* a click sets a corner, a drag pulls out handles, a click on the first point closes the shape. Enter, Escape, a double click or a right click finishes the curve, Backspace takes the last point back. In the mode *Auto* every click sets a point that rounds itself. * *Freehand:* just draw. The stroke comes out smooth, and ending near the start closes it. * *Rectangle, Ellipse, Arrow:* drag to draw. Shift gives a square, a circle or a 45° line. A plain click makes a shape of default size. After a curve is finished, the Select tool is active again. The pen draws a curve: one corner, one point with handles pulled out, a dashed preview up to the pointer The line at the bottom of the Compositor always tells you what a click or a drag does right now. 4. Editing Point at something and it reacts: a point grows, and the hint line names what a click, a drag or a double click will do. The pointer over a point of the ellipse, the point has grown, the hint line explains the mouse buttons * Drag a point to move it, drag a handle to shape the curve. * Drag an edge to bend it. Shift + drag moves the edge parallel. * A double click on an edge inserts a point and leaves the shape as it is. A double click on a point switches between a sharp corner and an automatic round point. * Drag a frame around several points to select them. A box with 8 handles appears: a handle scales, just outside a corner you rotate, inside the box you move. The cross in the middle is the pivot, and you can move it. * Arrow keys move the selected points, Shift + arrow in steps of 10. Delete removes them, Escape deselects. * Ctrl+D duplicates the selected curve. * Every finished action is exactly one Ctrl+Z step. Three points of the ellipse selected with a frame, the box with its 8 handles and the pivot The handles show the point type: a corner is a diamond, smooth is a square, symmetric is a square with a dot, automatic is a circle. If you find them too small, Settings → Handles in the panel has Large and Very large. A right click on a point opens a menu with everything for the point and its curve: The right click menu: point type, round corner, delete point, closed, fill, arrowhead, duplicate, order, hide, lock, delete curve 5. The panel The Sketcher panel in the Effect Inspector with the groups Layers, Selection, Curve, Track motion, Point list and Settings * *Keyframe row:* jump to the previous or next keyframe. The diamond sets a keyframe at the playhead. * *Layers:* one row per curve, the top row is in front. Drag a row to change the order. The eye hides a curve, the lock protects it, a double click renames it. A click on a row selects the curve in the Compositor, and the other way round. * *Selection:* buttons for the point type and for straight or curved edges, plus insert, delete, break and join. The line below explains the button under the pointer. Position X and Y place a point exactly, Round corners rounds a corner. * *Curve:* colour (with an eyedropper that takes the colour from the picture), opacity, width, the tip of the line, open or closed, fill, arrowhead and write-on. With nothing selected this group is called "Defaults for new curves". * *Track motion:* follows the selected points through the picture and writes keyframes, either on every frame or reduced. One run is one undo step. * *Point list:* the old table of points, folded away. A click on a row selects the point. * *Settings:* anti-aliasing and the size of the handles. Both apply to all curves. 6. Animating with write-on Write-on draws a curve bit by bit. Set a keyframe where the drawing should start and pull "to" down to 0 %. Set a second keyframe where it should be complete and put "to" at 100 %. In between, Cinelerra draws the curve step by step, and the arrowhead travels with the tip. The arrow half drawn at 0:00:01:18 and complete at 0:00:02:00 And this is what the render looks like, without any handles: A rendered frame: a yellow arrow points at the young dragon, a red ellipse around it, a white line below 7. Old projects Projects with Sketcher from CinGG 5.1 load and look exactly as before. There is one intended change: three or more automatic points exactly on one line now give a straight line instead of a small bulge. Closed shapes, fill, arrowheads and the round tip are new. How an older CinGG shows a project that uses them has not been tried yet. Known things * The mouse wheel over the picture steps frames as before. Zoom with the zoom control. * While Sketcher edits and the pointer is over the Compositor, V and B pick Select and Freehand. Splice and Overwrite don't react to them there. * Wide translucent lines look almost opaque, the same as in CinGG 5.1. * So far it has been tested on virtual X displays. Real desktops and HiDPI screens are where your help counts most. If something behaves differently from what I describe here, please tell me what you did, what you expected and what happened. A screenshot helps a lot, and so do your distribution and desktop. Sam